Climbing Kilimanjaro has been on my bucket list for a while. Kilimanjaro is one of the World’s Seven Summits, and is the highest free-standing mountain in the world. As the highest mountain on the continent of Africa – it is also known as the “Ceiling of Africa.” As summiting Kilimanjaro does not require any technical climbing skills; it is often seen as one of more “approachable” of the world’s seven summits for the average person. Having a whole year to travel during my sabbatical accorded me the opportunity to have a comfortable window of time to attempt this bucket list trek. After relaxing in Zanzibar for nearly a month, I figured I had stored enough energy reserves to head over to the mainland to attempt the trek. This post is a practical guide on how to prepare for climbing Mount Kilimanjaro.
Content:
- Best time to hike Kilimanjaro
- Kilimanjaro Routes and Recommendations
- Best Prices, and Best time to book a Kilimanjaro Trek
- Pre-trek Preparation
- Gear Preparation
- My pre-trek experience
- Final thoughts on How to Prepare for Kilimanjaro
- Packing list for a 6-7 Day Kilimanjaro Trek
This post includes affiliate links. If you make a purchase via one of these links, I may receive a small percentage at no extra cost to you.
Best time to hike Kilimanjaro:
When considering the best time to trek Kilimanjaro, it is important to remember that Tanzania is located just south of the Equator. This means that the seasons as we know them in the Northern Hemisphere are reversed (ie: December in Tanzania is technically “summer”). Due to proximity to the Equator however; Tanzania generally does not experience 4 different seasons. What will most dictate the best time of when to trek, are the two wet seasons Kilimanjaro experiences from March to June, and from November to December. It is best to try to avoid the wet seasons – as rain makes the trek much more challenging.
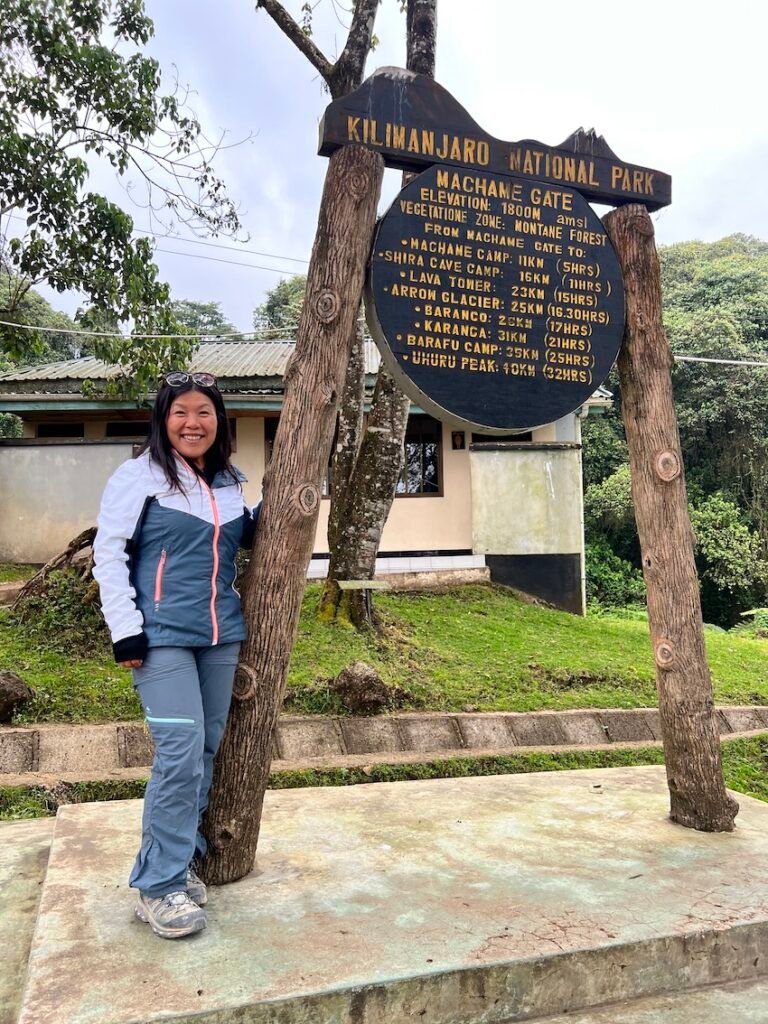
Kilimanjaro Routes and Recommendations:
There are 7 major routes to summit Kilimanjaro. They are, in general order of popularity: The Machame Route, the Marangu Route, the Lemosho Route, the Rongai Route, the Northern Circuit route, the Umbwe Route, and the Shira Plateau Route. The Machame, Marangu and Lemosho routes represent the lions’ share in terms of popularity among the majority of climbers.
The Macheme route is excellent for acclimatization as it follows the principle of climb high, sleep low. However, this means that the route is also one of the more challenging routes due to the fact that you’ll always climb to a high elevation daily, but climb back down to sleep – for some it can be psychologically more challenging to lose hard-earned elevation daily even if it means your body is going to acclimate better to the altitude because of this.
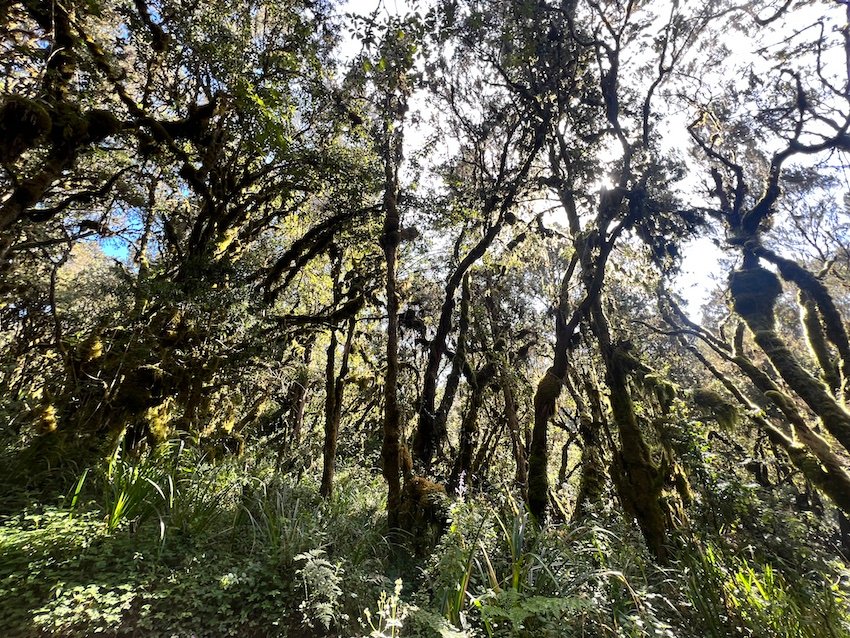
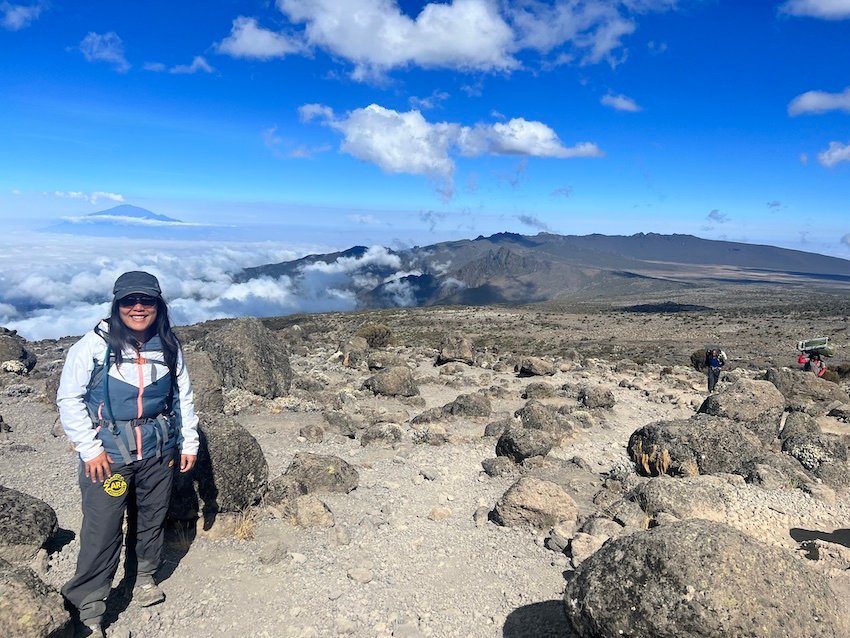
The Lemosho route is another popular route that has a different start point than Machame, but converges with the Machame and Rongai routes at Barranco camp and follows the same route afterwards to the summit. The Marangu (or the “Coca-Cola” route) used to be one of the most popular routes, and features a more steady climb compared to the ups and downs of the Machame route. The Marangu route is also the only trek that utilizes huts rather than tented encampments. I did the Machame route and found the route to be visually stunning – and enjoyed the scenery of the different climatic zones we passed through. While I have not done the other routes – feedback I heard from the guides is that Machame is one of the most beautiful routes to Kilimanjaro summit.
Kilimanjaro Trek – Best Prices, and Best time to Book:
Kilimanjaro trek pricing is quite dynamic, at the time of this blog post’s publishing the best pricing I have found is with Buigi Chato Safaris – a very well-reviewed company for a variety of treks, including: 6 Day Marangu Trek, 7 day Lemosho Trek, and 8 day Lemosho Trek. I also found good pricing with Africa Natural Tours – another highly reviewed company – for a range of different treks – such as this 6 day Machame Trek and this 7 day Machame Trek. Please allocate approximately $50USD a day for tips for your trekking team of guides, porters, cooks etc. Approximately $300 – $350USD in cash on top of the trek purchase price. Your trekking team works incredibly hard, and tips are an important source of income for them and their families. Note: The pricing I highlighted are the best prices I could find at the time of publishing of this post. Prices may change by time you read this so do shop around (click treks of 3+ days on left-hand navigation bar to narrow down search) and compare.
My strong recommendation is the choose the longest trek you can afford. I would not recommend a trek length of less than 6 days. Depending on the elevation profile, 6 days treks have a success rate of about 65%, 7 day treks: 80%+, and 8 day treks: 90%+. Longer treks cost more money, but each additional day on the mountain gives you a huge advantage in terms of acclimatization and greatly enhances the likelihood you’ll make the summit. Having hiked one of the shortest Kilimanjaro treks – a 6 day Machame route – I will tell you I would have paid $1000 more around days 4-5 of my trek to have had the opportunity to have had just one more additional day of rest and acclimatization on the mountain. You don’t want to fly all the way to Tanzania, and be most of the way up Kilimanjaro to have to grapple with the idea of not making the summit. Sometimes spending a couple of hundred dollars more when you originally book your trek – is the difference between failure and success.
After a few years of observation, I noticed that the best time to book a Kilimanjaro trek, appears to be around the low-climbing season – roughly a month before the main climbing season ends around October until around January – basically when very few people are thinking of climbing Kilimanjaro. I found that that you can secure an excellent price for a trek in a more favorable time of the year – ie: July – September if you book in the previous October-January – at post-season marked down prices. This is just anecdotal observation – but trekking companies may be consolidating finances for the year ahead at that time when they have far fewer bookings, so if you are a planner – it might be a good idea to check out pricing around October-January to obtain the best price for a trek.
I recommend booking your trek through a 3rd party company like Viator for a number of important reasons: one, is that you can pay with credit card; and two, is for accountability for a refund in case the company goes bankrupt before your tour, or something goes wrong during your trek. Using a credit card to pay with a reputable 3rd party booking agency like Viator means you have two avenues for a refund in case something goes wrong with your booking: 1) refund through your credit card for services not rendered and; 2) through the booking agency. Dealing with getting a refund through a 3rd party agency like Viator or through your credit card, is typically going to be easier than trying to get a refund from a company headquartered halfway around the world.
I found a great deal for a 6 day Machame Trek with Zara Tours, and after reading some reviews, promptly booked it. Zara Tours is one of the largest Kilimanjaro tour operators, and has good reviews and a strong track record as a reputable Kilimanjaro trekking company. Its tour pricing is not always the most affordable – but its reputation and track-record are solid.

Pre-trek Preparation:
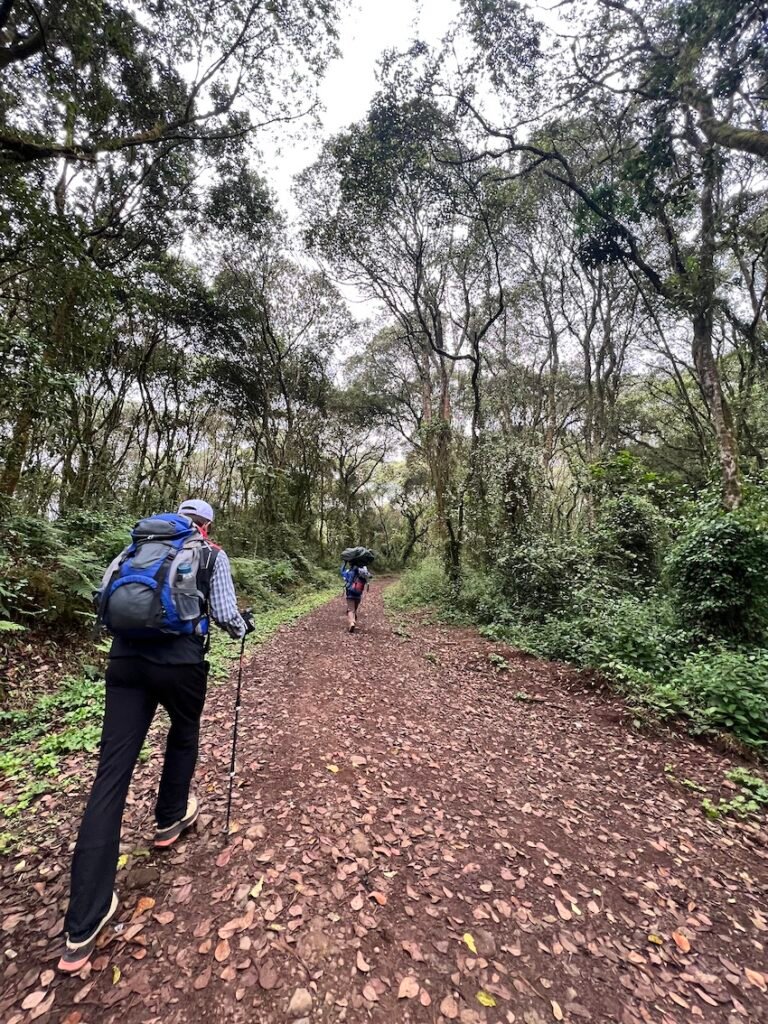
While Kilimanjaro is one of the least technical of the world’s seven summits – it is by no means an easy trek. Given the considerable fatigue that hiking at altitude adds, I would recommend hikers have the ability to walk at least 15-20km in familiar conditions before attempting Kilimanjaro. Your days on the mountain typically will not be this long kilometer-wise, but hiking at altitude will mean you will move more slowly – so sheer endurance under tiring conditions for a whole day; and on summit night – exhausting conditions – will be key to your success. For my part, doing several high-altitude hikes in Peru – like the Salkantay trek – gave me both the training and confidence to know I had the ability to succeed on Kilimanjaro. If you have the option to do some high altitude trekking prior to Kilimanjaro – do so. It is also a good idea to do a check-in with your doctor to make sure you’re clear to hike at altitudes up of nearly 6000meters. Altitude-related complications can happen – but they can be reduced by choosing longer treks to aid in acclimatisation.
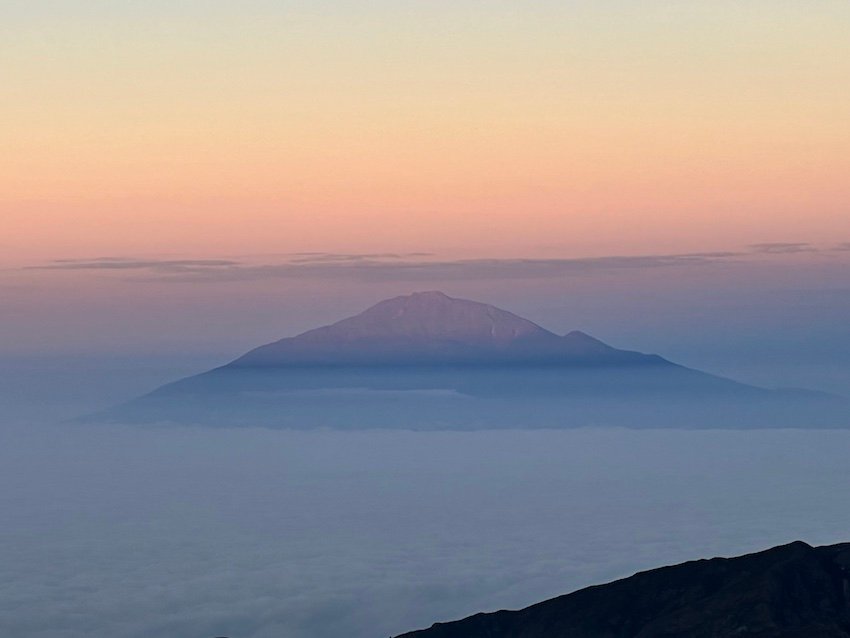
Some hikers actually choose to summit nearby Mount Meru situated at 4600M as a training run for Mount Kilimanjaro. Summiting Mount Meru ahead of Kilimanjaro will most certainly enhance acclimatization. It is important to note however, that in order for the acclimatization effects of Mount Meru to carry forward to your Kilimanjaro trek – you pretty much have to do the two treks back-to-back. This can actually decrease your chances of success on Kilimanjaro if you are too exhausted after Mount Meru. While Mount Meru is situated at a lower altitude than Kilimanjaro, it is actually a more challenging climb – so it’s important not to underestimate it. Unless you have a particular interest in summiting Mount Meru, I would say a better way to ensure success for Kilimanjaro is simply to pick the longest Kilimanjaro trek you can afford.
Gear Preparation:
For those who are flying into Tanzania specifically for a Kilimanjaro trek, I have included a comprehensive packing list at the end of this blog. I recommend strongly to travel wearing your essential gear if you’re flying. Wear your hiking boots, and bring your essential clothing like jacket, rainpants and sleeping bag in your carry-on if travelling by air – in case the airline loses your baggage. Items like warmth layers are easy to buy or rent in Moshi, but finding good boots that fit for example is much more challenging.
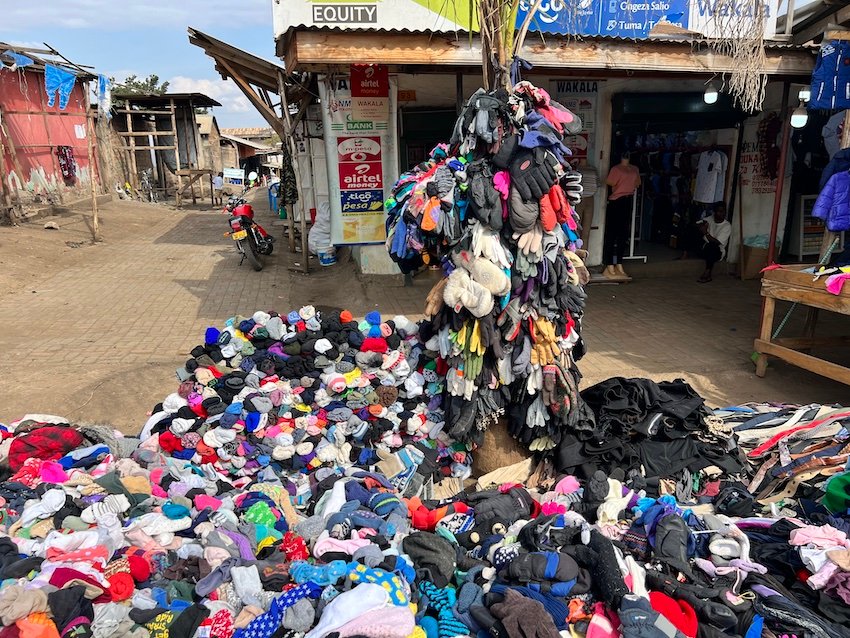
If you are on a round-the-world trip like I was and need to buy equipment for a Kilimanjaro trek – note that you’ll be able to find used warm layers, hats and gloves quite readily – likely equipment left behind by previous hikers that locals have cleaned to be resold. I would recommend having at least your own high quality hiking boots, and rainshell that you can layer up to 3-4 layers plus a down or fleece jacket underneath. In the case of extra warm layers, hats and gloves, I found it cheaper just to buy those used – it cost me less than $8USD to buy a pair of used snow gloves and a synthetic down jacket – renting would have cost over double this. See my post on Moshi for some more details on shops and market locations.
Expect to rent a proper sleeping bag and waterproof hiking pants if you do not already have them – as these items are not easy to buy in Moshi. I would strongly recommend coming with your own high quality hiking boots – I used Saloman Quest 4D hiking boots (women/men) – but if you really need to, there are also companies that will also rent you hiking boots as well. Note that boot rentals are rarer than sleeping bag and apparel rentals – as boots are such an essential piece of gear that most companies assume individuals will bring their own. Gear rentals are available in-town at AT Gear – which was recommended to me by a number of different trekking companies – in downtown Moshi but you can also rent from most hotels that are associated with a tour company.
My Kilimanjaro trek with Zara Tours included a pre-trek stay at the Springlands Hotel in Moshi. The hotel has a rental shop, and I inquired about gear rentals since I needed a sleeping bag and rain pants. The rain pant rental ($12USD) were of exceptional quality – similar to what you would see on Arcteryx ski pants with side zips to release heat. I was less impressed with the sleeping bag selection ($40USD), they were all synthetic, and very bulky – the one I selected had a -30C rating embroidered on it, but it didn’t seem like a -30C bag – the bag weighed 3KG and took up nearly half of my 60L backpack that I was going to give to the porters to carry up on the trek. I rented the sleeping bag with them anyway out of convenience. If you are particular about gear rentals, I recommend you arrive early in Moshi so you have time to test out gear at different shops before renting your items.
My pre-trek experience:
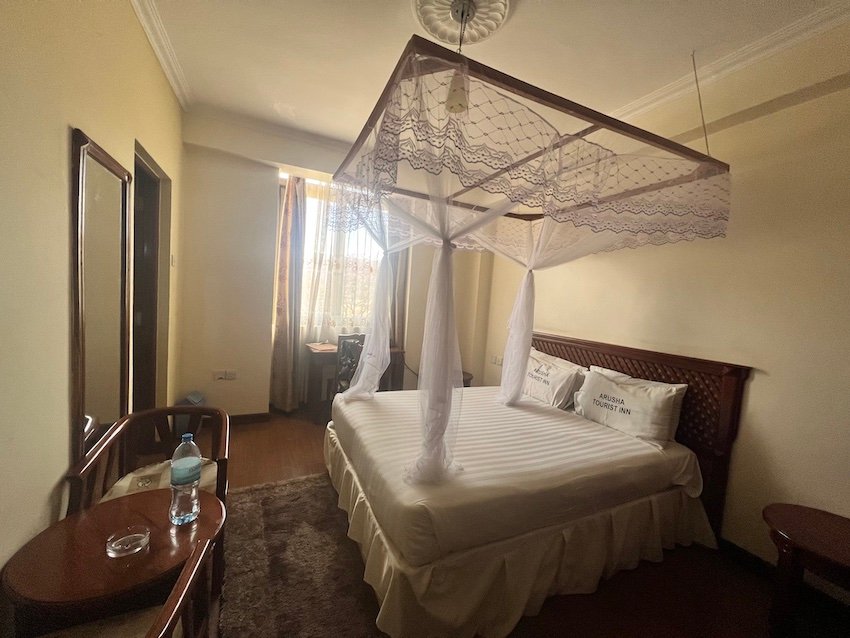
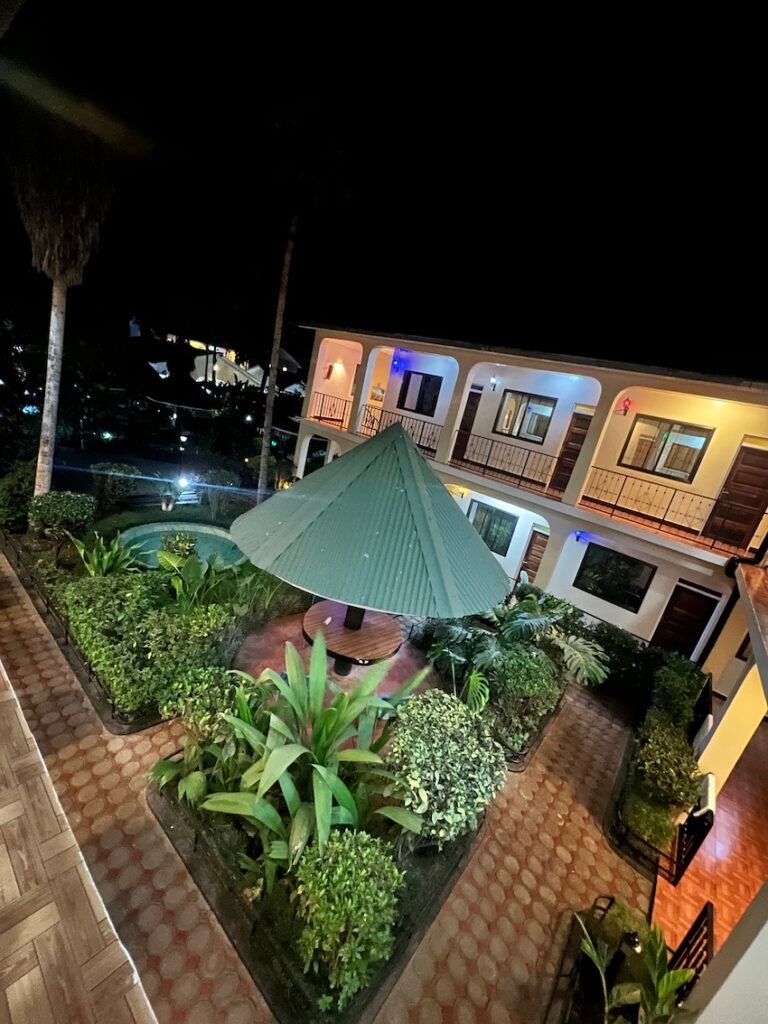
After flying into Kilimanjaro Airport (JRO) from Zanzibar, I stayed at the Comfy Stay (now known as the Royal Wonders Hotel) before my Kilimanjaro tour started. I chose Comfy Stay because it was walking distance to Springlands Hotel where I had my pre-trek stay booked. If I were to do it over would stay closer to Moshi downtown core to be closer to shops and services. As I did not travel with trekking gear aside from my hiking boots, jacket and hiking poles, I had to go to Moshi Town centre to buy some used trekking clothing at the central market.
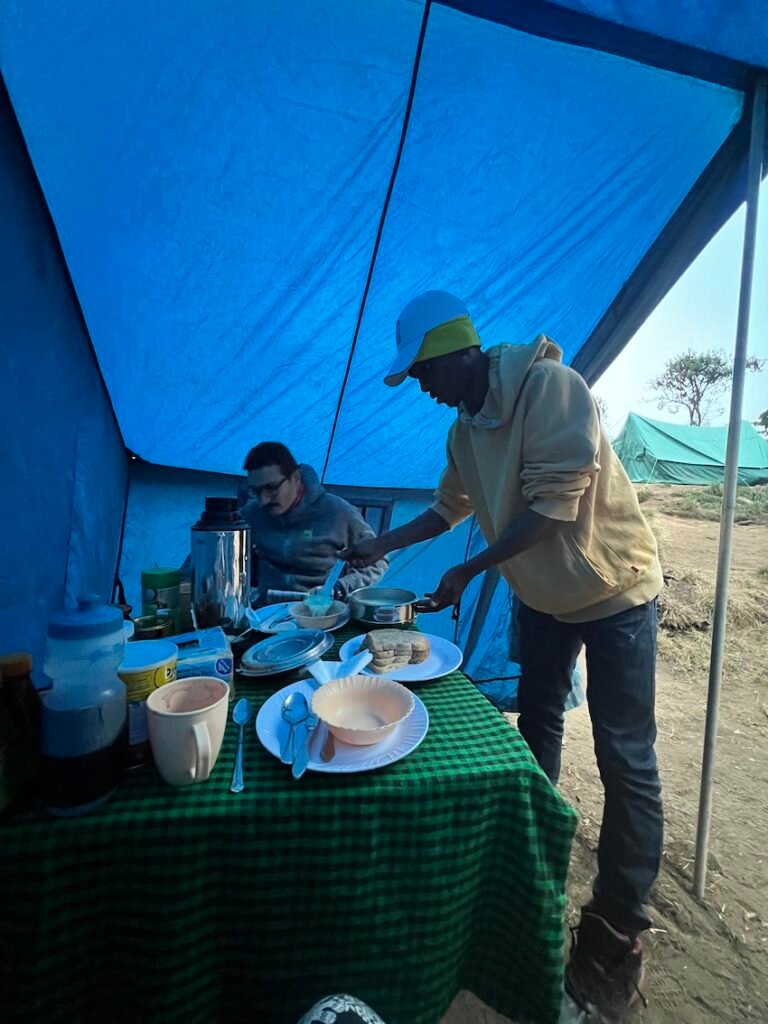
Once I checked into the Springland hotel, I was directed to my guide for the pre-trek briefing. My guide’s name was Victor, and he has been working on the mountain for over 20 years, starting as a porter, then eventually graduated through all the working roles like cook, waiter, assistant guide and now guide. Victor walked me through what was going to happen through each day of the trek, and answered any questions I had.
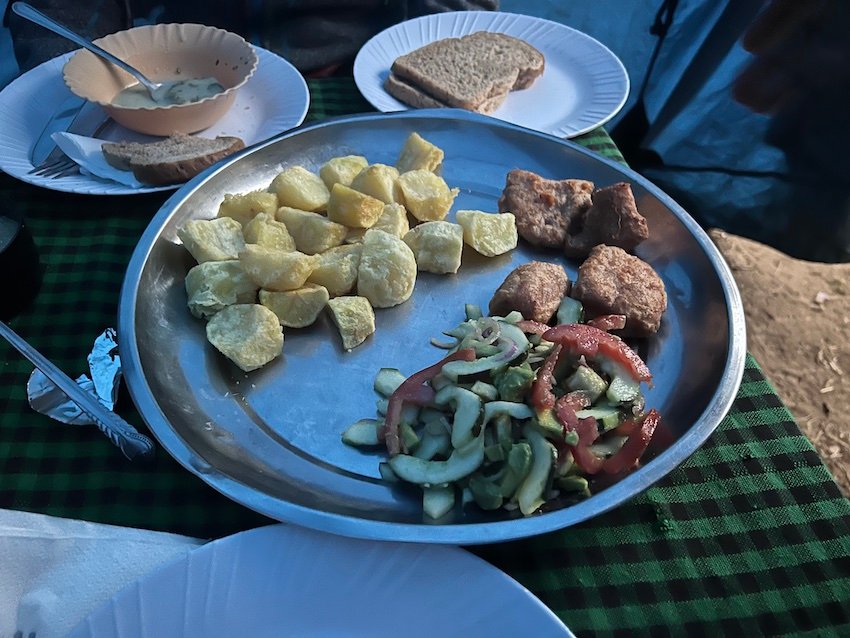
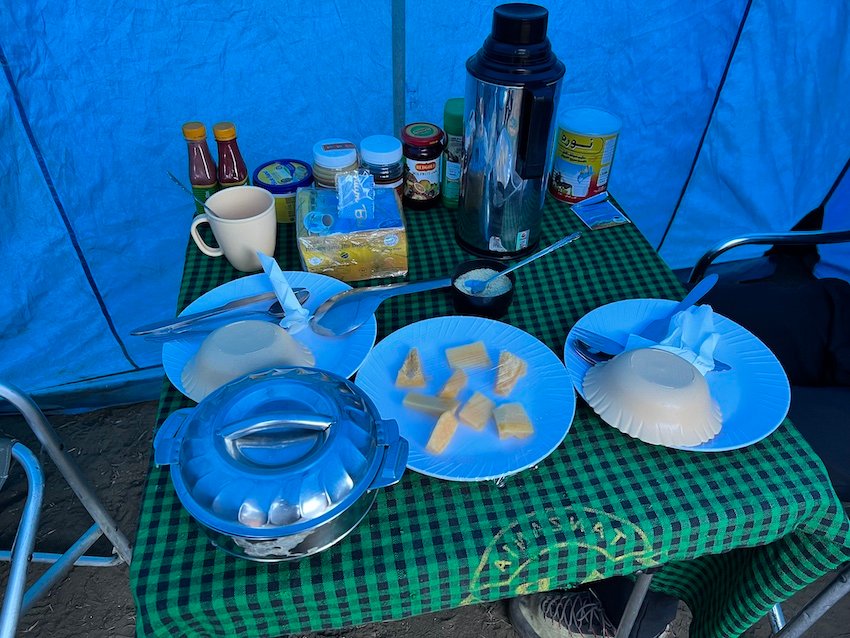
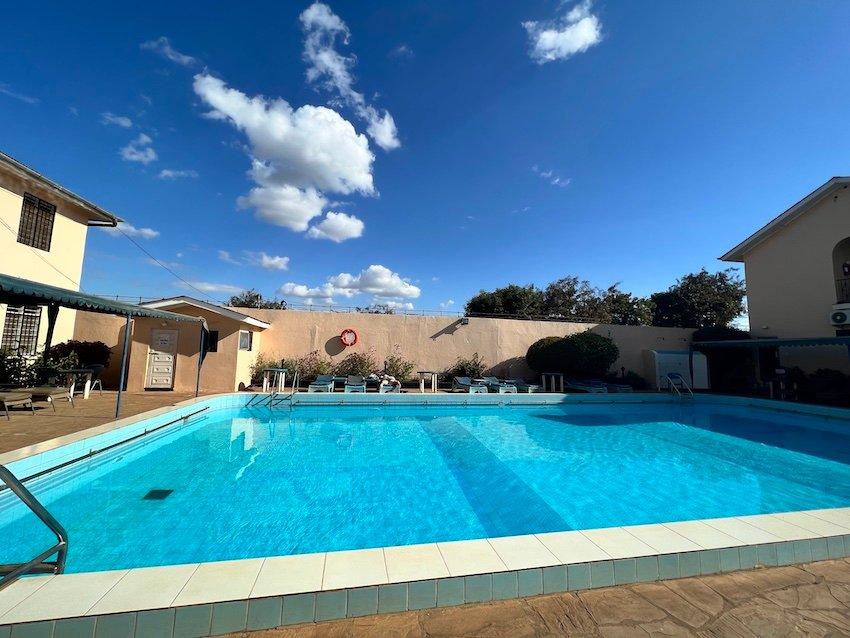
My stay included full board, so I was treated to a delicious buffet lunch after my pre-trek meeting. I relaxed by the onsite pool – which was welcomely chilly against the late afternoon heat. The staff at the restaurant does an excellent job of seating single travellers with other single travellers. The hotel was basically completely occupied by other trekkers. At dinner, I was seated with a lovely German woman called Elke – who 69 years old and doing the Lemosho route for the 2nd time! She summited Lemosho the year before, and was drawn to do the trek again.
Elke did the trek in 9 days the first time, and reported that she felt strong throughout the trek, this really highlights the power of extra days on the mountain on acclimation. She did leave me with a cautionary tale that evening: when she summited Kilimanjaro the year before, there was an American man in his 50s who made the summit, but then also died there. I had so many mixed thoughts and emotions after Elke told me that story – from “I really wish she didn’t tell me that story” to “What am I getting myself into?”; but I eventually resolved that I was going to really listen to my body and if something did not feel right, I would stop. I am very goal-oriented individual. When it comes to physical activities – if I put my mind to it, I have a tendency to push my limits and beyond. After hearing Elke’s story however, I resolved that if something truly did not feel right; that it would not be worth risking my life to make the summit.
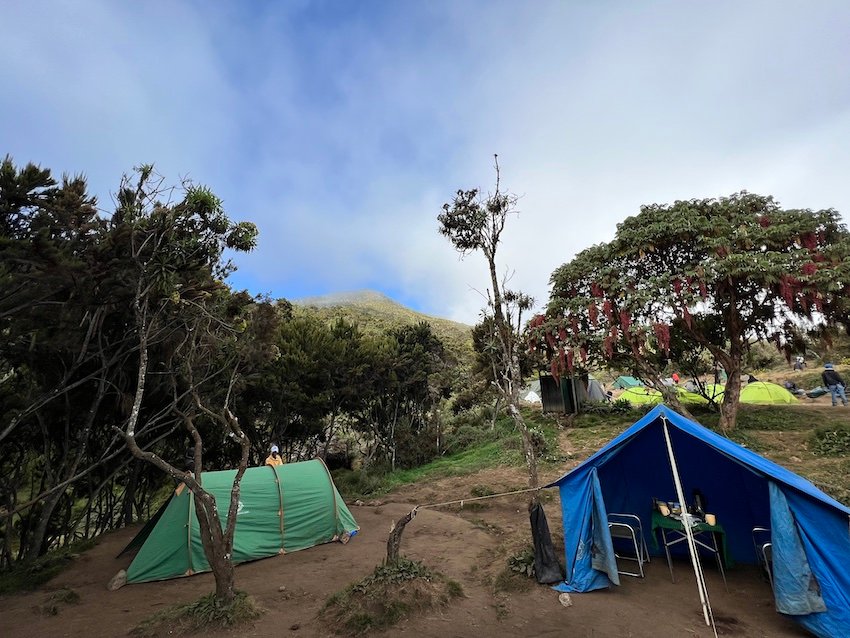
After dinner I headed back to my room to finish packing. I used my 60L Deuter backpack to carry my sleeping bag, clothes and toiletries for the porters to carry. You can give the porters a maximum of 15KG to carry. My bag came in at around 12KG. I used my 20L daypack, to carry my water bladder, water bottle, 1 merino longsleeve, merino hoodie, rainjacket, rainpants, rain poncho, a few first aid essentials and some snacks – just things I would need during the day. Any items I did not need for the trek, I put into the gigantic rental sleeping bag sack that I did not need for the trek, to put in storage at the hotel during the trek.
Final thoughts on How to Prepare for Kilimanjaro:
Kilimanjaro is the 4th highest peak of the World’s Seven Summits – after giants like Everest, Aconcagua, and Denali. While considered one of the least technical among the 7 summits – do not underestimate the impact being above 4000m to nearly 6000m will have on your body. Proper acclimatization is often the difference between a 69 year old woman with little climbing experience making it to the summit, and a 28 year old cross-fitter not. The fact that males under the age of 30 have the lowest completion rate is an indication that brute physical fitness is not going to be the most important success factor.
Ideally you should aim to prepare for Kilimanjaro at least a year or more before you attempt the trek. Hiking experience will definitely help, and if you have the opportunity to do some high altitude trekking – above 3000 – 4000meters – this will give you an important gauge of how successful you’ll be on Kilimanjaro. If you already struggle at altitudes of 4000 meters – choose the longest trek you can afford – a minimum of 7 days or more can assure most hikers can make it to the summit. The longer the trek, the higher your probability of success.
Packing List for a 6-7 Day Trek of Mount Kilimanjaro:
- Sturdy hiking boots ideally with ankle support. I use and love Saloman’s Quest 4D hiking boots (women/men) – they are considered some of the best in the market.
- Sleeping bag rated for at least -10C – either your own or rented from your tour agency. This affordable down sleeping bag has great reviews and is rated for -12C.
- Silk sleep sack – useful if you are renting a sleeping bag. Also provides an extra 3-5C of warmth.
- 20 – 30L hiking backpack. The Osprey Talon is one of the best hiking backpacks on the market. If you’re traveling light, consider this ultralight expandable 20L-30L backpack with lightweight back support and hip and chest straps – it also comes with a rain cover, is waterbladder compatible and only weighs 1lbs.
- Large duffel or backpack for items up to 15KG total that you’ll give to your porters every day.
- 1 rainshell. Goretex is excellent for repelling rain but also breaking wind and insulating. A regular rainshell would also work. Consider these well-reviewed lightweight Goretex jackets (Women / Men)
- Hiking poles I use these tri-fold hiking poles that can fit into my daypack when not in use.
- 2L water bladder (highly recommended so you don’t have to reach back or take off your backpack to get a drink of water. You’ll want to hydrate often given the conditions.
- Headlamp – for the evenings and for trekking in the pre-dawn hours. I prefer using a rechargeable headlamp to avoid disposable batteries.
- Power bank. I used this one on Kilimanjaro. Avoid powerbanks over 20000mAh for trips involving air-travel.
- A She-wee – a device for women to pee standing up like a man. I didn’t have one of these but it would have been very helpful. As you trek higher and higher up the mountain, vegetation to hide behind while peeing becomes more and more sparse. Being able to stand and pee with just your fly down like a guy will save you many extra steps trying to find a suitable place to pee.
- Sunscreen. I love using La Roche Posay SPF 50 for Kids a super-powerful sunscreen that’s also gentler on my sensitive skin.
- Insect repellent – for the evenings. I prefer Icardin-based repellents – just as effective as Deet, but much safer.
- Brimmed hat or ballcap
- Flip-flops or hiking sandals for post-hike
- 5-6 T-shirts one for each day of the hike – plus an extra for post-hike. I love Icebreaker Merino t-shirts (women/men)– as they dry quickly and resist odors even after multiple wears.
- Rainproof pants. Goretex hiking pants will repel rain as well as break the wind – especially helpful for summit night (Men / Women). Order a size larger – as you’ll want to layer 2-3 warmth layers underneath on summit night
- 1 pair of post-hike pants. I brought a pair of tights as well as another pair of looser pants – I wore both pairs layered one over the other on summit night
- Lightweight towel
- Bar shampoo – I use this as my everything soap (Optional: there are no showers on the trek. Your waiter will bring you a basin of warm water to washup with in your tent every morning)
- LIghtweight towel
- 2-3 pairs of hiking socks. I use Icebreaker Merino socks (women/men), as they have a lifetime guarantee. If your socks ever develop holes, just send open a claim online with some photos, and Icebreaker will send you a giftcard for the value of the socks!
- 1 pair of convertible hiking pants (men/women) – useful if you ever need shorts on the hike.
- 1-2 pairs of rainproof snow gloves. My hiking buddy brought waterproof ice-climbing gloves which can also work well as they’re insulated, weatherproof and give you more hand dexterity. I mention 1-2 pairs because if one pair gets wet – you still have a second pair. This would be useful on summit night, where your first pair might soak through with sweat and freeze like mine did.
- 1-2 long sleeve shirts (for the evenings)
- 1 warm fleece (men/women) or down jacket (men/women) – important layer to keep warm during the evenings and essential layer for summit night
- Toque/beenie – essential for summit night, and other colder nights along the trek
- Neck buff/gaiter – to keep your neck warm and also helpful for pulling up over your face and nose on Summit night
- $50 – $100USD in cash. You’ll likely not need this much cash, but it’s good to have a small amount with you just in case. For the gratuity at the end of the hike your guide can instruct the driver to stop at an ATM for you to withdraw larger amounts of cash should you not already have it with you.